On the Student Center, students have the ability to search, enroll, withdraw, swap, and drop classes, and change grade options for classes.
- Login to the Student Center
- In the Academics section drop-down box, select Class Schedule
- Click the Go button (double arrow)
- If prompted, select the correct term and click CONTINUE
Note: Students can view specific schedule information by using the Class Schedule Filter Options. To show classes that you are waitlisted for, check the Show Waitlisted Classes and click filter.
- Login to the Student Center
- In the Academics section, click the Enroll link
- If prompted, select the correct term and click CONTINUE
- Select classes:
- If all desired classes are in your Shopping Cart, skip to step 5
- If the class/schedule number is known, enter the number in the Enter Class Nbr box and click enter
- If the class/schedule number is unknown, click the search button
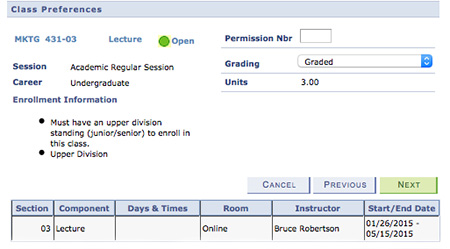
5. Enter class preferences:
- To use a permission number
- NOTE: Only use if the course is closed, instructor permission is required, or after the open registration period ends.
- Click the Class link for the course.
- Enter the permission number in the Permission Nbr box
- Click NEXT
- To be added to the waitlist if a class is full:
- Click the Class link for the course
- Check the Wait List box
- Click NEXT
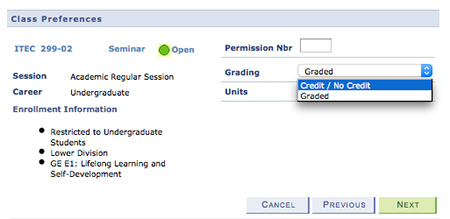
- To change the grading option (e.g., Credit/No Credit):
- Click the Class link for the course
- Select the correct grade option from the Grading drop-down box
- Click NEXT
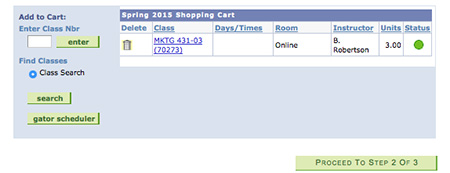
6. Click PROCEED to STEP 2 OF 3
7. Click FINISH ENROLLING
Enrolling in Lecture/Lab Combined Sections
A combined section is a lecture and lab or activity that must be taken concurrently. Enrolling in a lecture section will automatically sign you up for a predetermined lab or activity section. Combined sections will be noted in the course details and will also appear in search results as alternating Lecture and Lab options under a single course header.
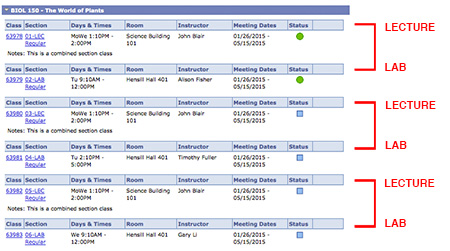
To enroll in a combined section, enroll in the lecture section using the same procedure as for enrolling in an individual class.
Note: If students select a lab rather than the lecture section while enrolling, they will see an extra prompt asking them to verify the lecture section.
- Locate the Academics section,
- Click Enroll
- If prompted, select the correct term and click CONTINUE
- Select classes:
- If all desired classes are in your Shopping Cart, click the course title link (step 4)
- If the class number is known, enter the number in the Enter Class Nbr box and click enter
- If the class number is unknown, click the search button
Class preferences
- To use a permission number click the Class link for the course
- Enter the permission number in the Permission Nbr box
- Click NEXT
- Click PROCEED to STEP 2 OF 3
- Click FINISH ENROLLING
Additional information
- A permission number can not override closed classes during priority and open registration periods.
- Starting the third week of the term, permission numbers will be required to enroll in a course and can override a closed class.
- A permission number is required to override prerequisite issues; you may need to consult with an advisor separately on ways to meet course prerequisites.
For more registration information, please visit our Registration Information page.
Swap a Class
Swapping a class allows students to exchange one class for another without loss of enrollment in the initial class if the second class is unavailable.
- Log in to the Student Center
- In the Academics section drop-down box, select Enrollment: Swap
- Click the Go button (double arrow)
- If prompted, select the correct term and click CONTINUE
- In the Swap This Class section, use the Select from your schedule drop-down box to select the class to be swapped out
- In the With This Class section, search or enter the class number
- Enter class preferences
- Click NEXT
- Review the updates and click FINISH SWAPPING
If the second class is available, the schedule will be updated. If the second class is unavailable, no change will take place. If the option to waitlist the class was selected, the schedule will update if the class becomes available.
Drop a Class
Dropping a class will permanently remove that class from your schedule. Dropping a class without academic penalty is only allowed during the first three weeks of instruction.
- Log in to the Student Center
- In the Academics section drop-down box, select Enrollment: Drop
- Click the Go button (double arrow)
- If prompted, select the correct term and click CONTINUE
- Check the boxes next to the classes to be dropped
- Click DROP SELECTED CLASSES
- Review the changes and click FINISH DROPPING
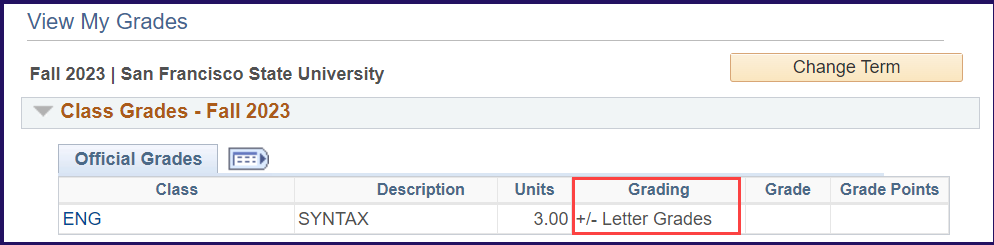
Viewing Grading Options
Similar to Changing Grading options, to view your course's grading options status open the Student Center and select one of the options from the Other Academic drop down menu:
Option 1: Open the Grades page
Option 2: Open the Enrollment: Edit page
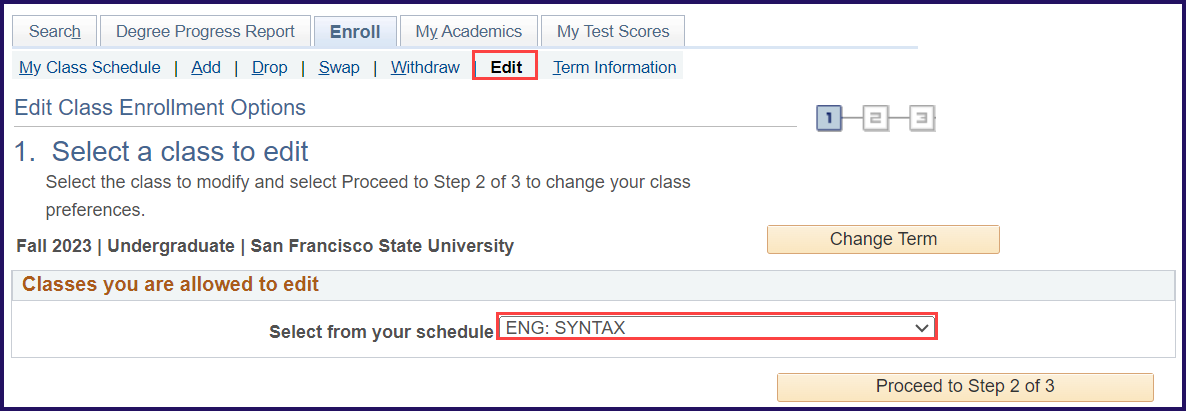
Changing Grading Options
- Login to the Student Center
- In the Academics section drop-down box, select Enrollment: Edit
- Click the Go button (double arrow)
- If prompted, select the correct term and click CONTINUE
- In the Select from your schedule drop-down box, select the correct class
- Click PROCEED TO STEP 2 OF 3
- In the Grading drop-down box, select the grading option
- Click NEXT
- Review the change and click FINISH EDITING