Through SF State Gateway, faculty can assign and email students permission numbers, and review prerequisites for a set of potential students before deciding who to assign permission numbers to.
- Log in to SF State Gateway
- Navigate to your LaunchPad
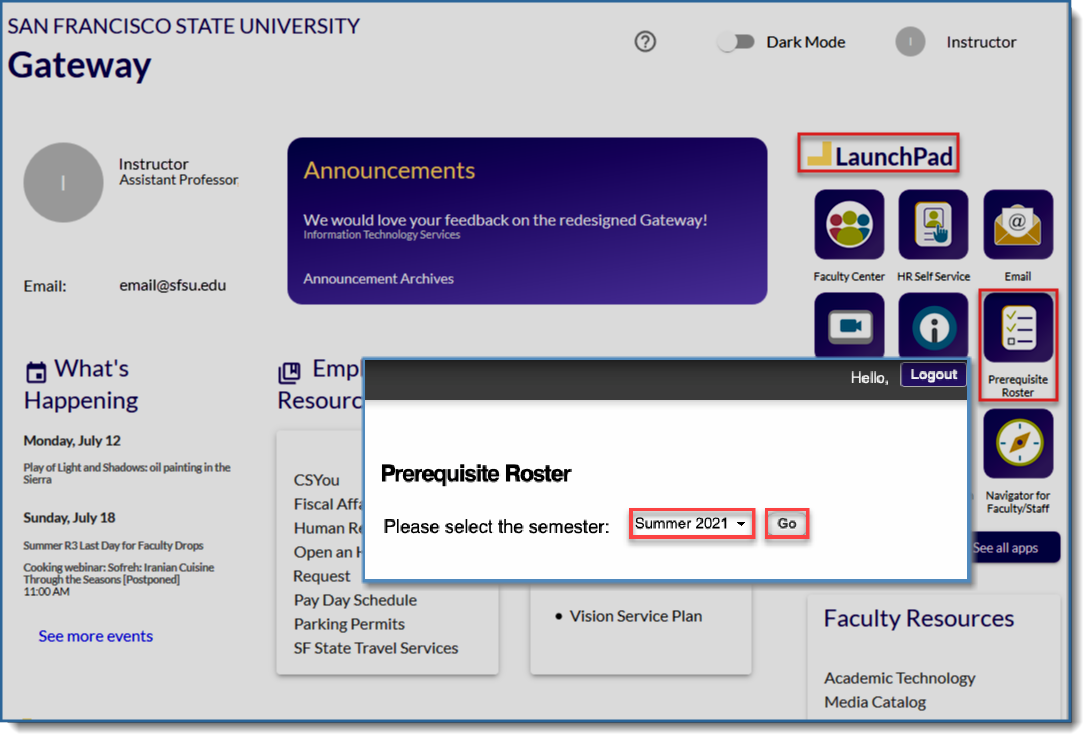
- Click the Prerequisite Roster tile
- When in the Prerequisite Roster webapp choose a term then select the Go button
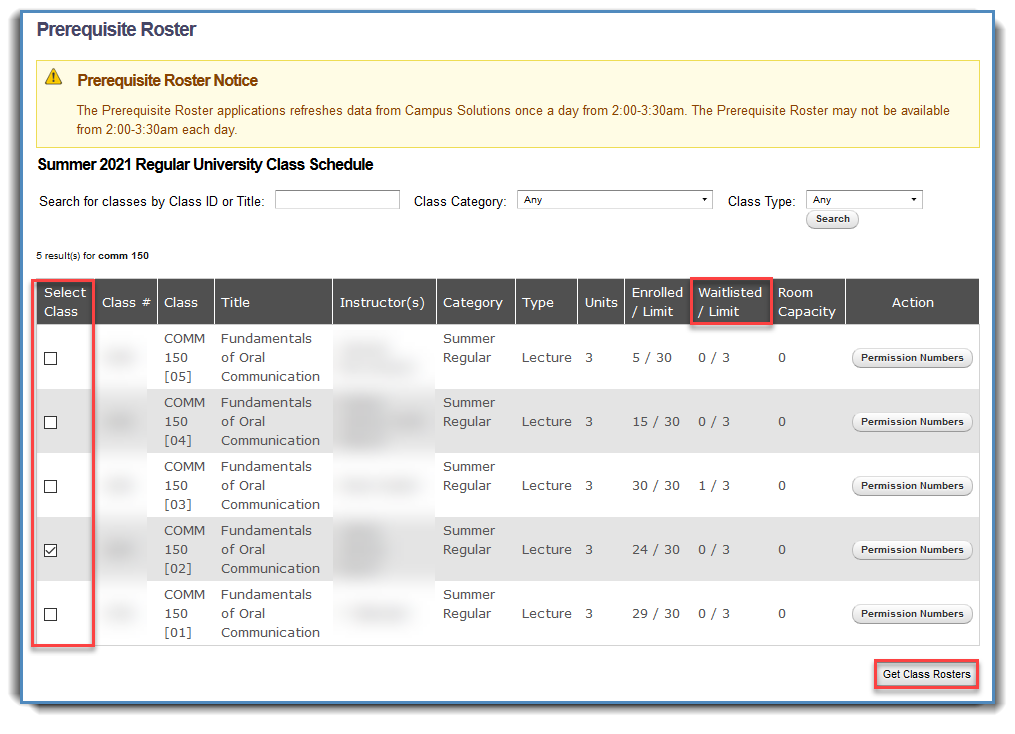
- Search or navigate to the class for which you want to assess students for Permission Number assignment, then select the Permission Number button under the Action column
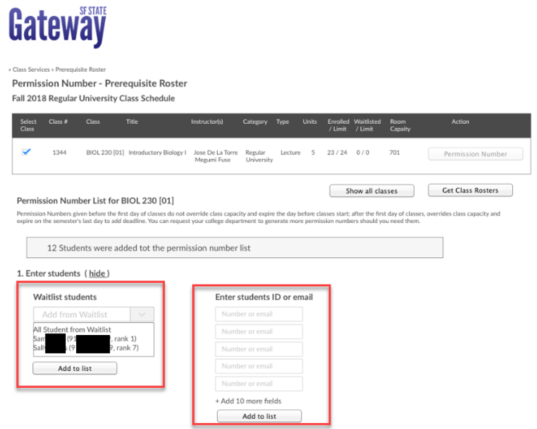
There are two options to add students to the Permission Number Worksheet:
- By SF State ID or email
- Select students from the Waitlist
When you add students to the worksheet, you have the option to assign permission numbers right away or to return to the worksheet later to assign them.
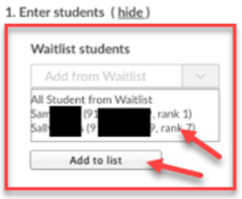
By Waitlist
Use the dropdown menu to select individuals, or all students, from the waitlist, then select the Add to List button:
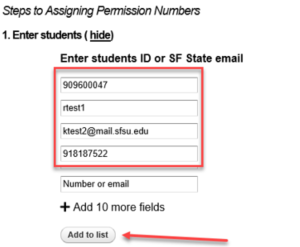
By SF State ID or Email
Enter SF State ID or email (you can add more than one student at a time), then select the Add to List button.
Before assigning permission numbers, you may want to check which students have or have not met specific course or test prerequisites.
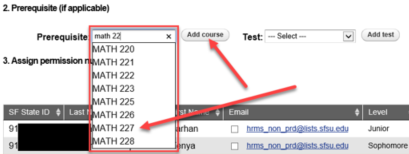
By Course
Add a prerequisite course by entering course ID & catalog number and then select the Add course button

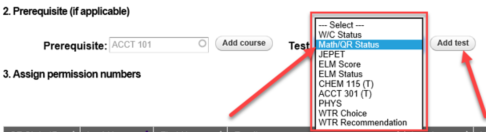
By Test
Add a prerequisite course by entering course ID & catalog number and then select the Add test button

Multiple Prerequisites
You can also check multiple prerequisites:
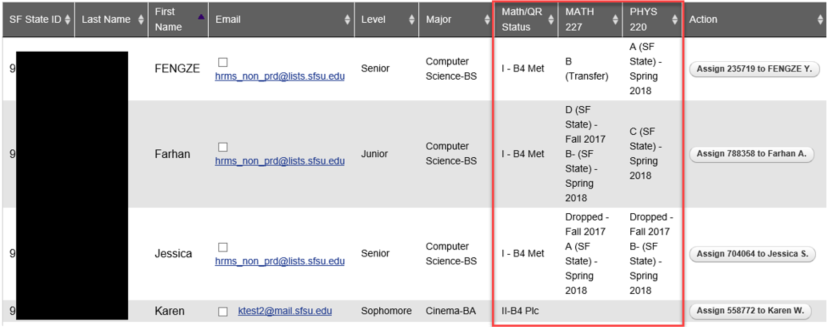
Once you are ready to assign permission number to a student, select the Assign button for that student in the Worksheet:

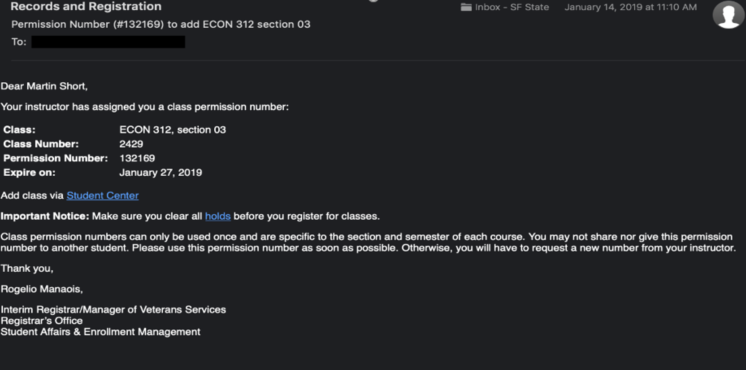
An email with the permission number will be sent to the student’s SF State email.
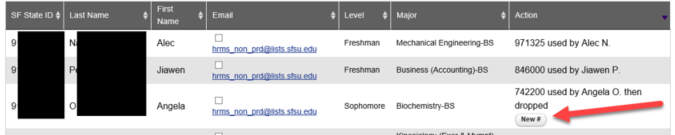
You also have the option of reassigning a different permission number to the same student if the student used the first permission number to successfully enroll and then dropped the class, or if the permission number was used by another student.
- Sample of the email the student receives after being assigned a permission number:
- When a permission number is assigned, you will be able to see the name of the person who used it in the Action column:
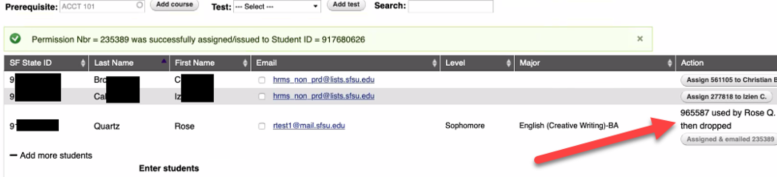
- The example below illustrates how it will look if a permission number was used to enroll a student who was not assigned the permission number by the instructor:

- The instructor has the option to assign new permission number to Edmark, if deemed appropriate.
- The instructor can additionally decide whether or not to “instructor drop” Joey, if deemed appropriate. Instructor drops can only be performed on the Class Roster in the Faculty Center.