Registration is an exciting time! By planning ahead and using our helpful planning resources, you can create a class schedule that is intellectually engaging and helps you progress towards earning your degree.
SF State's 5-Step strategy can help you create a comprehensive enrollment and graduation plan so you can spend more time studying and enjoying your time at SF State.
A hold may be placed on your account for academic, financial, health and safety, or administrative activity and progress reasons.
Some of these holds can prevent enrollment in classes if they are not cleared or addressed before your enrollment appointment. To identify these holds and understand how they affect you, follow the steps below.
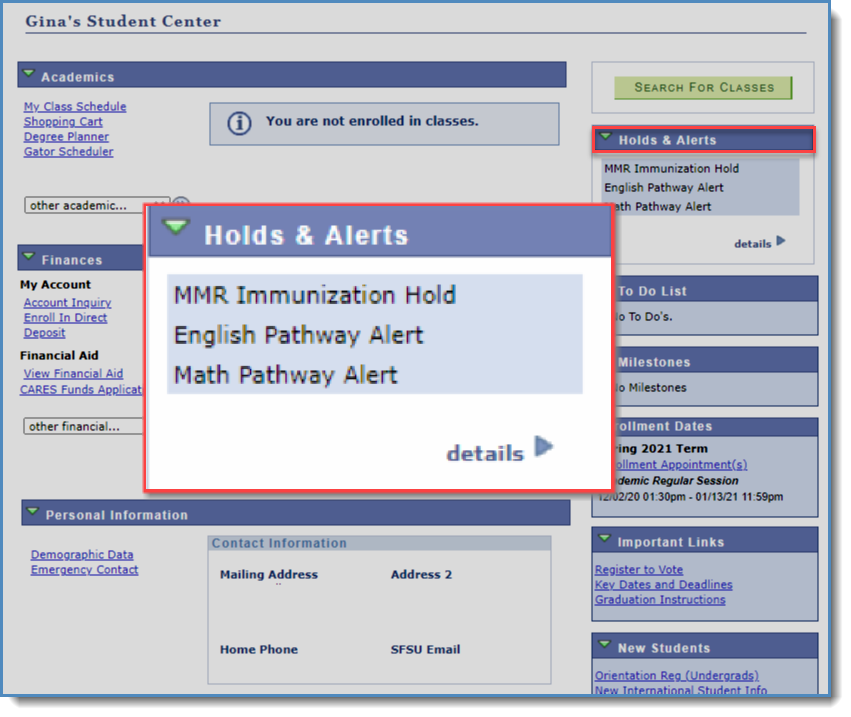
- Open your Student Center
- Locate the message box titled Holds & Alerts
- If “No Holds” is listed, you have no holds or system messages
- If items are listed, click the Details link.
- Please Note: not all holds prevent registration. Holds that do prevent registration indicate this in the Details section.
- Click through the hold listing to see more information on the hold's purpose and how to clear it.
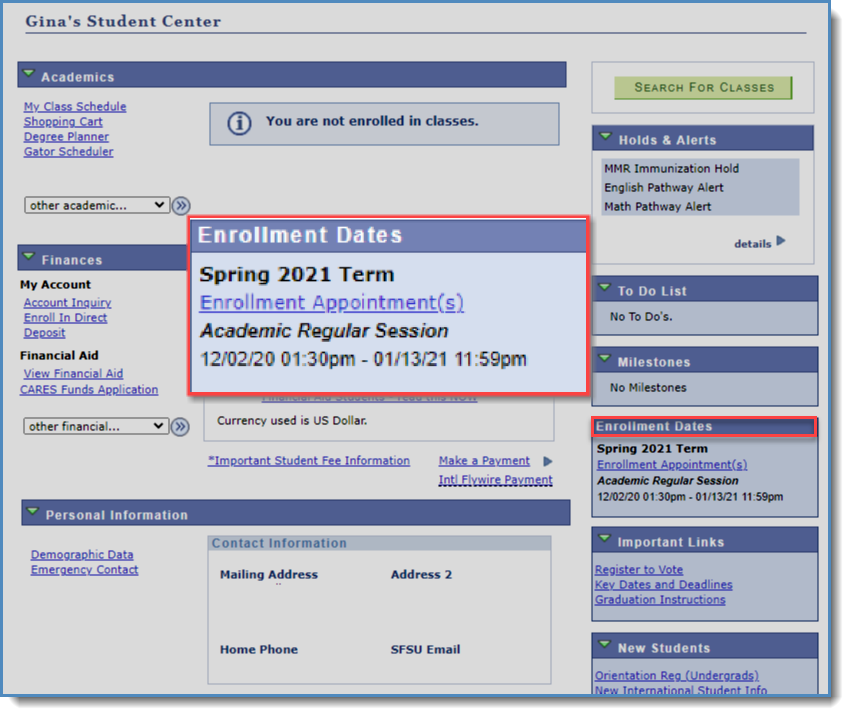
Your enrollment appointment is the Date and Time in which you will be able to enroll in classes for a future term. To identify your Enrollment Appointment, follow the steps below.
- Open your Student Center
- Locate the message box titled Enrollment Dates
- Identify the correct Term appointment for the semester you intend to register for, as multiple appointment times may be present.
- Please Note: newly admitted students will get an initial registration appointment by signing up for orientation or during SF State's Open Registration period for the semester they enter SF State.
As you plan your courses for next semester, please keep in mind that taking 30 units a year can speed up your path towards earning a degree, saving you time and money. While many students choose to take 15 units each semester, we recognize this does not work for all students. We encourage you to Think 30 and consider enrolling in winter or summer courses to get ahead in your degree!
SF State has developed enrollment tools designed to help you locate classes needed for degree completion and generate schedules that work around your needs.
Plan for Timely Degree Completion
You can plan your entire academic path to graduation using Degree Planner. Each time you enter the Degree Planner, the system determines which degree requirements you have met and which are still remaining, and then provides a recommended plan promoting timely graduation. You can make adjustments to your plan 24/7, including moving classes between terms and selecting your preferred unit load each semester.
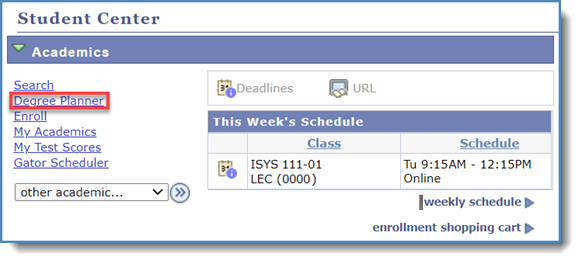
- Open your Student Center
- Under the Academics header, click the Degree Planner link
- For more information on how to use Degree Planner, visit our Degree Planner guide.
- Once you're satisfied with your plan click the Gator Scheduler button to import your classes!
Plan classes that meet your schedule and learning needs
Create a class schedule based on your specific class requirements, academic and personal needs, and availability. Access Gator Scheduler to see what classes are offered and create or save multiple schedule options. You can even start by loading the plan you created for your Degree Planner!
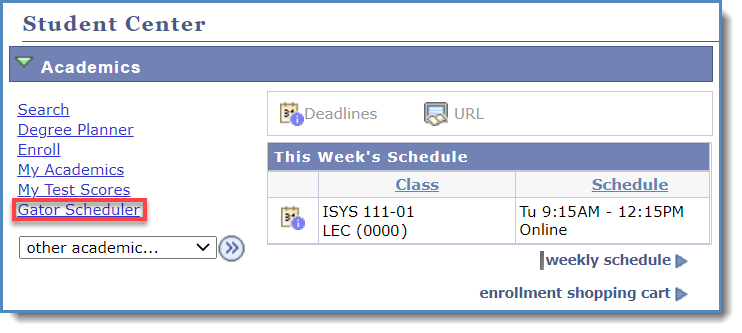
- Open your Student Center
- Under the Academics header, click the Gator Scheduler link
- For more information on how to use Gator Scheduler, visit our Gator Scheduler guide.
- And be aware that you can easily select classes from your Degree Planner Plan, see instructions here!
Review our video guide to learn how to identify instructional modes and review class notes for important attendance details.
Using Gator Scheduler to create a schedule allows you to import a class schedule into your shopping cart, select preferred courses, create breaks, and generate a schedules accordingly. This system highlights any potential problems with your selections, such as time conflicts. Using Gator Scheduler also allows you to make adjustments to your course selections before meeting with an advisor, allowing you to spend that appointment focused on degree planning and other questions you may have.
Use the Gator Scheduler to Import courses to your Shopping Cart
- Once a schedule is generated transfer it to your Shopping Cart
- Click the View option for the desired schedule
- A pop-up window will display the schedule
- Click the Send Schedule to Shopping Cart button (top of page)
- On the pop-up confirmation screen, click OK
- Note: Continuing to your enrollment shopping cart will close the Gator Scheduler
- Click the Close button, in the window that pops up, after you have sent your schedule to your shopping cart
- Go back to the Gator Scheduler Launch window (the window started on)
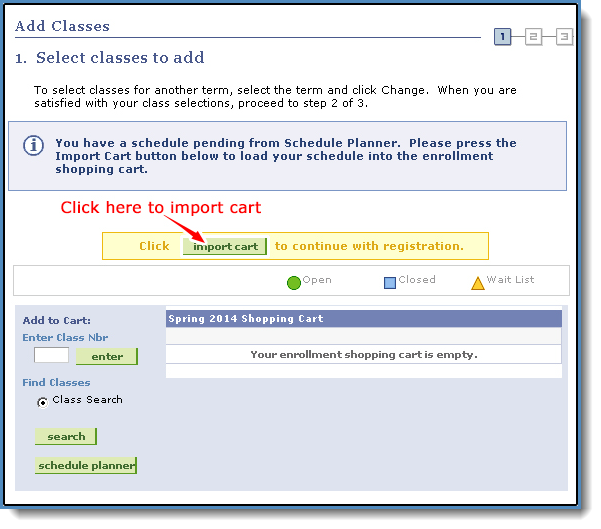
- Click the green button labeled COURSE ENROLLMENT
- Inside the yellow rectangular box, click Import Cart
- Click the green button labeled NEXT
- Click the green button labeled PROCEED TO STEP 2 OF 3
- For more information on how to navigate the Student Center, visit our Student Center User guide
Use the Shopping Cart Before Your Priority Enrollment Appointment
Using the Shopping Cart can make it easier to register right when your Priority Enrollment Appointment opens. You can store classes you wish to take in your Shopping Cart until it is time for your enrollment appointment. Access your Shopping Cart from your Enrollment Dashboard. You can also create a schedule using Gator Scheduler (see above), and then import your schedule from Gator Scheduler directly into your Shopping Cart.
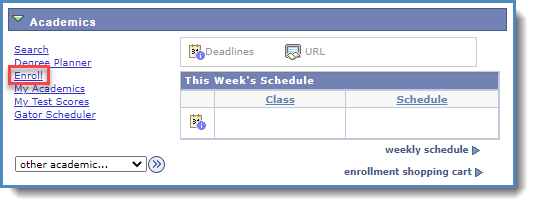
- Open your Student Center
- Under the Academics header, click the Enroll link
- Then select the Enroll tab
- Click the Add option to access the Shopping Cart
- For more information on how to navigate the Student Center, visit our Student Center User guide.
- Max Units during Priority Enrollment (Grad and Undergrad):
- Max Fall and Spring units: 16 Enrolled | including 12 Waitlisted
- Max Summer Units: 14 Enrolled | including 5 Waitlisted
Priority Enrollment Appointment
Once you have courses in your shopping cart, or have imported your Gator Scheduler schedule into your shopping cart, you will be prepared to enroll once your priority enrollment appointment opens. (Step 2, above, shows you how to find your priority enrollment appointment date in your Student Center).
- During your Enrollment Appointment, open the Student Center
- Under the Academics header, click the Enroll link
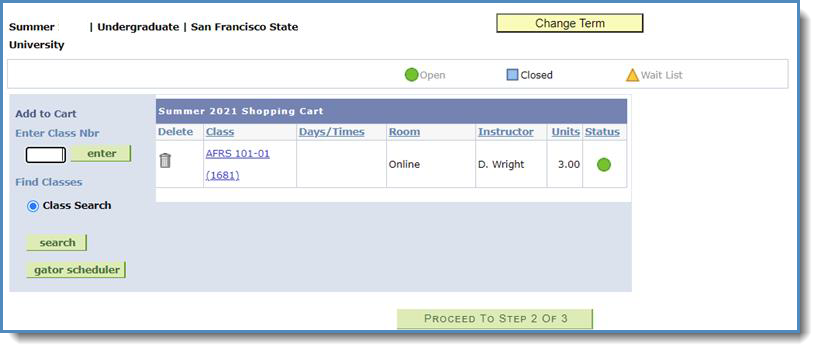
- You can either enter the class number of the course you want to enroll or use the Class Search
- Look over your Shopping Cart selection, then click the Proceed to Step 2 of 3 button
- For more information on how to navigate the Enrollment Dashboard, visit our Student Center guide.
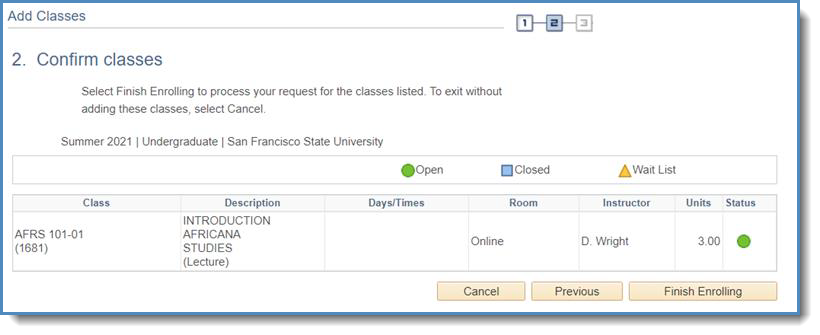
- Make sure to complete your request by clicking Finish Enrolling
Adding classes during your Priority Enrollment Appointment
- Enrolling earlier in the registration period increases your chances of finding open spots in the classes you need or prefer.
- Enrolling before the first day of instruction gives you more time to evaluate the class and to decide whether it is a good fit for you. Most classes do not require permission numbers until the third week of classes.
- All add/drop decisions must be made by the established add/drop deadline for each term.
For more information on how to Add, Drop, Swap classes, update grading options, or other items, visit our Student Center User guides and our Gator Scheduler User Guides.
For more information about the below registration subjects, please visit our additional registration & enrollment site.
- Dropping and withdrawing
- Can’t register due to unmet prerequisites
- Dropped for unmet prerequisites
- Full-time vs. part-time enrollment status
- Adding with permission numbers
- Using permission numbers after the first day of instruction
- Waitlist
- Special programs (registration at other campuses)
- Grading options
- Time conflicts
The class schedule includes a learning mode column that specifies how the class will meet. The modalities include:
| Modality | Description |
|---|---|
| Online Asynchronous | Class meets entirely online with no set day/time. |
| Online Synchronous | Class meets entirely online at scheduled days/times. |
| Hybrid (online asynchronous with occasional in-person) | Class meets mostly online with no set day/time and has occasional in-person meetings. See class note for the in-person meeting days/times. |
| Online Bichronous (mostly online asynchronous with occasional online synchronous) | Class meets mostly online with no set day/time and has occasional online meetings at scheduled days/times. See class note for meeting days/times. |
| Hybrid (Online synchronous with occasional in-person) | Class meets mostly online at scheduled days/times and has occasional in-person meetings. See class note for the in-person meeting days/times. |
| Hybrid (Combination of in-person and online asynchronous) | Class meets regularly in-person at scheduled days/times and online with no set day/time. |
| Hybrid (Combination of in-person and online synchronous) | Class meets regularly in-person and online with scheduled days/times. |
| In-Person | Class meets in-person at scheduled days/times. |
| Online Bichronous (Combination of online synchronous and online asynchronous) | Class meets entirely online with some scheduled meeting days/times and some with no set day/time. |
| Online Bichronous with Occasional In-Person (Combination of online synchronous, online asynchronous, and occasional in-person) | Class meets online with some scheduled meeting days/times and some with no set day/time. The class also has occasional in-person meetings. See class note for the in-person meeting days/times. |
If you are adding during a registration period in which permission is required, please get in touch with the course instructor or department to request a permission number (conditions to receive a permission number vary for each course, department, and college). Once obtained, permission numbers can be entered through the Student Center when adding classes to the shopping cart.
Please note that if you are on a course waitlist, you will first need to drop the course and then add the course with the permission number you received.
For questions related to getting a permission number, please contact the course instructor or department. For instructions about using a permission number, view our User Guide.
For questions related to getting a permission number, please contact the course instructor or department. For instructions about using a permission number, view our User Guide.
Most courses do not require a permission number for enrollment during the first two weeks of a Fall or Spring semester (For Summer, it's the first three days)
If seats are available and permission is not specified, you can enroll in the course normally until the start of the third week of the semester.
A limited number of waitlist spots are available for the majority of undergraduate courses and select graduate courses. The waitlist option is available for you to select when enrolling in a course. When seats become available in a closed course, a process will automatically enroll the first student on the waitlist as long as all prerequisites for the course are met. If you do not meet the course prerequisites, the process will select the next student on the waitlist who satisfies all course prerequisites. You may be waitlisted for up to 12 units at a time. You cannot be waitlisted and enrolled in the same class.
Waitlist scenarios
- I want to be on the waitlist for a course that conflicts with another open course in which I want to enroll. If I get into the waitlisted course, I will want to drop the course that presents a time conflict. Enroll in the open course using the "add a class" instructions as usual. Next, select the "swap" option and swap the currently enrolled class with the waitlisted course to successfully swap the courses, should seats become available in the waitlisted course.
- I am currently waitlisted for 11 units but want to change the courses I am waiting for because I cannot be waitlisted for more than 12 units. Drop any or all of the courses for which you are waitlisted using the "drop" function. Select the appropriate course to drop, and proceed with the drop process. Once a waitlisted course is dropped, your position number on the waitlist is forfeited. You can now add your desired waitlist course as long as it will not exceed the maximum waitlist units of 12.
- If you have a Registration Hold, the process will select the next student on the waitlist who satisfies all course prerequisites. You may be waitlisted for up to 12 units at a time.
Many offices across campus are here to help you with questions. Don’t hesitate to reach out to any of these areas if you need support.
Financial Aid
For financial aid information, scholarships, loans, deadlines, and disbursement dates, visit the Financial Aid Homepage.
Tuition and Refunds
For information on tuition fees, payment deadlines, and refund schedules, visit the Bursar's Office website.
Academic Advising
If you need any guidance to help you plan your classes, one of our academic advisors can assist.
Registrar’s Office
And of course, the Registrar’s Office is always a resource for registration-related questions you may have!